Installing cIOS
cIOS is a very important part of Wii softmodding. Its primary function is to allow the playing of backup games, but it does other things as well. This guide will show you how to install cIOS on your Wii Mini.
Requirements
- A USB drive formatted as FAT32 (the one you have used previously will work)
- d2xl cIOS Installer
- A way to transfer files to the USB drive
Preparing d2xl cIOS Installer
First, plug the USB drive into whatever you are using to transfer files to it.
Extract the d2xl .zip file that you downloaded earlier.
Move its contents to the apps folder on your USB drive.
Eject the USB drive
Installing d2xl cIOS
Plug the USB drive into your console and turn it on.
Next, open the Homebrew Channel on your Wii Mini. There should now be an app named d2xl cIOS Installer. Select this app and press Load.
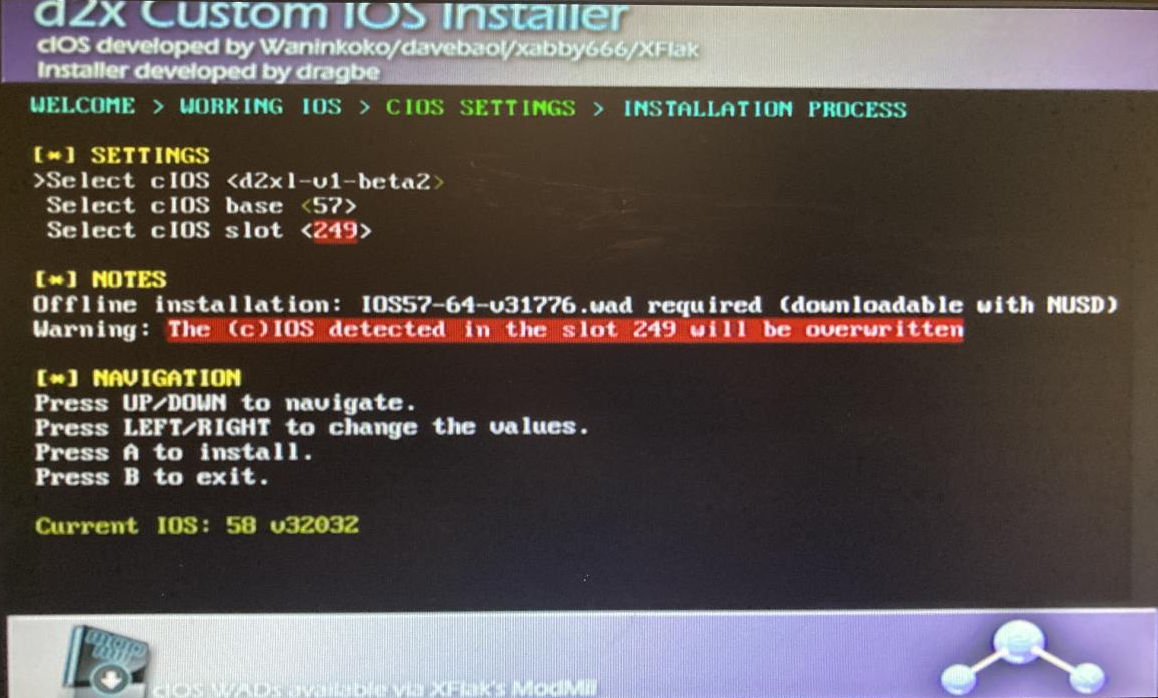
You will then see a screen with options to select. Change the options as follows:
cIOS: d2xl-v1-beta2cIOS base: 57cIOS slot: 249
When you have adjusted all the settings, the screen should look similar to this:
Once you have verified the settings, press A to install. It may take a little while.
If you get an error regarding the revision number, highlight the cIOS option, and change the cIOS one to the right, then try installing it again.
When the installation has completed, press B to exit the installer.
You are now done installing cIOS on your Wii Mini.
Congratulations! You have completed the basic steps of softmodding your Wii Mini! At this point, you have a few options:
(optional, but recommended) Connecting your Wii Mini to ethernet
(optional, highly recommended) Backing up and running your games on USB
If neither of these options interest you, you may continue to some things to keep in mind when running homebrew on a Wii Mini